 |
| The Spiral Challenge |
I saw the Homebrew_PCBs Yahoo Group Double Spiral Challenge web page, that provided the art work for process challenge, with several standard width traces and spacing. The image is used to produce two concentric PCB trace spirals, where the acceptable resistance between and end-to-end specifications are given.
In my early days of trying to make PCB, I could only hope for something that actually worked, regardless of the asthetics or (then low) resolution.
Now that I can produce High Resolution Homebrew Printed Circuit Boards almost 100% of the time, I decided to take the Yahoo Group Double Spiral Challenge. I selected the (mid range) "spiral-10mil" Challenge as a starting point. It is 10 mil traces with 10 mil spacing. A quick calculation, suggests that each spiral is about 200 inches (16 feet) long.
2 inch radius / (10 mil trace + 10 mil space) / 2 spirals * 4 inch average turn length ) = 200 inches
Currently, I use a Brother 1200dpi Laser printer (I know, most Toner Transfer users suggest it can not be used). A modified GBC Laminator and Pulsar Transfer Paper. See previous posts and my Salmoncon Take-Away-Notes.
I recently received a new stock of Double Sided PCB Material and wanted to try this new material.
My first attempt to Transfer an Toner Image, was flawed, a small hair or fuzz was trapped between the transfer paper and the PCB material. That is no real problem, I just re-scrub, reprint and to try again.
 |
| My Initial Results |
The first thing that I forgot in the process, was to tape over the back side, to avoid unnecessarily etching of the extra copper. The process took much more time and Ferric Chloride than I expected. I thought this could be a problem.
From my previous Homebrew PCB build process, I know that the faster the etch and the smaller the copper area to be etched, creates the best results. This etch was taking to long!
The results, . . . . FAILURE !
 |
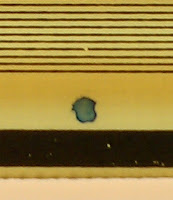
| The flaw is on the forth trace above the ink spot |
All of the open flaws appear to be the results of etching through toner pin holes or single point under cutting. The opens did not appear to be the results of general narrowing of the traces. Each opens spot was shorter than the traces width themselves.
I will take the Challenge again, maybe even at a high resolution, but I will pay much more attentions to the details.
For now, I have a nice new, . . coaster.
Update: see http://wa0uwh.blogspot.com/search/label/Spiral
--
No comments:
Post a Comment