Saturday, September 21, 2013

Routers

The last few days, I have been in "Router Hell" or "Router Heaven", with a little Amateur Radio thrown in ( but, . . . it all depends on your perspective ! ).

I have two "routers", one in my Shop/Hanger, and one in my Boathouse. The two sites are about 12 miles apart. Each router has had it own difficulties that I should have corrected before this.

For the last few months (actually longer than that), I have been having problems with my Shop network. It sometimes would get very slow, my connection from the Shop to the Internet is via;
  1. First, a short RF hop to my neighbors house,
  2. another RF longer hop to the local ISP house.
  3. and then a long RF link to a mountain about 10 miles away,
  4. then another RF Link back down the mountain (another 10 miles) to the Longhaul ISP servers shop,
  5. and then wires into the city of Everett, where it finally meets the Internet.
As you can see it is not exactly a pretty sight.

But, because I do NOT have good tools or insight to the actual Radio Links, it is difficult for me to test the network and know where there is difficulty. Just when I feel I-have-had-enough, it starts working very well and I forget my frustrations.

The WiMax connection at the Boathouse is also slow, but I attributed that to my CLEAR Wire Modem location, which is necessarily located in a window between metal boathouses, with only a small RF window to an unknown tower location. Sometime it is slow and miserable to work with. The Boathouse Router/WiFi Access Point (WRT-54G) is directly connected to the CLEAR modem. The Security Configuration prevents others from using my allotted bandwidth.

Then, it finally it happened, . . . the Shop/Hanger Router stopped working, a 100% Failure - it was NOW time to fix things.

My local ISP (a support guy in the airpark), gave me another "used and different router" to try. He provide the basic configuration and checkout, but I would have to configure it for the "non-standard" way that I use routers. At first, it seamed difficult to find the router admin web pages to configure the functions that I needed. But a Google search (to the rescue) provided the information I needed, and a lot, - LOT more. My "new" router is a "Buffalo WHR-G54S Air Station" and it uses an Open System operating system, known as "DD-WRT".

With the new found information, I was able to easily configure my router with:
  • WiFi Station Channel and Security
  • NAT (Network IP Address Translation)
  • PAT (Application Port Address Translation and Redirection)
  • DHCP
  • DHCP, with some preassigned Static IP for a few devices
Google provided lot of additional information, like; how the DD-WRT can be downloaded to many standard commercial routers - Including the router that I use a the Boathouse.

One difficulty that I had in the past with my old router at the Boathouse, I could not configure my router to do "PAT" and therefore I could only have one device that would occupy a single inbound port. For example: "ssh" uses port 22, but I wanted to place several devices (e.g., Raspberry Pie and Beaglebone computers) in the Boathouse. I could have done it, but each would have to be specially configured to use yet another port for similar services. Which means each would be unique and difficult to quickly manage. Ideally, port management is done via "PAT" in the router where it belongs. My dumb old Boathouse router can not do "PAT".

Plus, by the end of the month, CLEAR will no longer support Static IP for my area, I will have to reconfigure my Domain Name to use Dynamic DNS, that is if I want to continue to use and access the Boathouse via "network known" addresses. I have already figured out the necessary changes to the CLEAR modem configuration.

So, I downloaded the Open Source "DD-WRT" for my router, with "only" some difficulties. I now have a new OS running on my router in the Boathouse, using all of the above service and configurations. I have already moved my Rpi web server to its new location, with a little Dynamic DNS service magic, it appears as always at: "http://rpi.wa0uwh.com:8040".

Google also provided another interesting Amateur Radio use of routers, via the Open Source efforts started by the DD-WRT group. The routers are being reconfigured as a "Mesh Network", very similar to the old "Packet Radio" network (I think I have my facts straight). As it turns out WiFi channels 1-6 overlap the Amateur Band, and therefore the devices can be used via "part 97". I need to learn more about this.

So, a short story - made long, after several days of work, . . . all-is-well with my routers (or as good they have ever has been).

Now, it is time for more reading about "Northwest Mesh Networks" !

--

Thursday, August 22, 2013

Larry's Hall Effect Project

Tuesday my friend, Larry - KB7KMO, came by for a visit and work in my shop.

Larry has been sailing around the world in his sailboat for that last few years. He returns to the Seattle area to see his grand kids and families. We try to get together at least once, each time he is in town.

For this visit, Larry had several projects that we worked on in the shop. He was in need of a way to monitor the output of his generator and/or other power sources that replenish his battery banks.

The Artwork and Toner Transfer
Ready to Etch
There are may commercial products that would work, but Larry wanted to try a custom solution. For this he has found several DIY projects that suggested Hall Effect devices to monitor current.

What was needed was a small DIY PCB to hold the Hall Effect device and the few other devices that provide the input for a monitor and display.

This PCB will be mounted on-or-near the power source. The Hall Effect device that Larry will be using is shown setting on the right edge of the PCB.

My previously used and blogged Toner Transfer PCB method was used to build the necessary remote boards. We used Inkscape to create the original artwork.

Larry Cutting the Reverse Side
Toner Transfer Image
Etching is simple; put the PCB in a ZipLoc Freezer Bag, with a small amount of Ferric Chloride, and then knead while under running hot water. For a 1 oz copper clad, the process takes about 4 minutes.

Larry at the Sink, kneading the bag while running Hot water
over it, which is filled with Etch and His board
The Cut boards,
Ready for Drilling
The Hall Effect device can handle a lot of current (+100 Amps) and therefore large pads were necessary. Additional copper strap will be used to increase the current handling abilities.

This is the first time I have tried making Toner Transfer PCB with large pads or Ground planes,  on my projects I normally avoid them by using cross hatch grid for the Ground Planes. Space for some small capacitors are also included for line conditioners at the remote.


Board Inspection
Larry will finish this project, when he returns to his boat, . . . somewhere on some distant, exotic tropical island paradise !

--

Sunday, May 12, 2013

My Low Pass Filters

With repairs of my boat almost complete, I can return to some Ham Radio projects.

The following are the files and artwork that I have used to create the Low Pass Filter, see my previous blog posts. As previously posted, the value of components were selected from junk box parts which are a close match as computed. The artwork is provide here as an ".svg" file suitable for use with Inkscape or other vector graphics programs. The intent is to allow space for as many identical parallel capacitors as necessary to provide the correct values. The coils are wound and measured as necessary. PCB SMA edge connectors are soldered on both sides of the PCB and are used to make connections easy.

30m Low Pass Filters

Inkscape SVG Low Pass Filter Artwork

My public URL of the SVG filer is: https://dl.dropboxusercontent.com/u/46313528/Published/OutputFilter_03.svg

Let me know if you build a Filter.

--

Tuesday, April 9, 2013

Been Working on Cyrene

I have NOT been in the Shack or working in my eShop much lately, I have been at the marina repairing my boat - Cyrene.

Cyrene on a Previous Cruise
Due to life's other duties and responsibilities, Cyrene has been neglected for several years. On our last boat trip, we had an engine or transmission failure. I did not know which, but I did know the repairs could be minor, or something major, Cyrene was stored afloat in the boathouse, . . . Well, now several (many) years later, it turns out to be major, which means $$$. My goal is to have Cyrene back on the water by May 1, ready for short cruises this summer.

Once Cyrene is repaired, and now that I am retired, I plan to operate my Ham Station form locations around Puget Sound, on the water as WA0UWH/m.

Puget Sound is a wonderful place to have a boat, there are many destination; marinas, bays, coves and anchorage. Also, easy access to Canadian inland water around Vancouver Island and Vancouver (city) is always a treat.
Cyrene Anchored Among the Stone Spirits
at Roscoe Bay Canada
(A few long years ago)
One of my favorite destinations is Roecoe Bay in Desolation Sound Canada. According to local lore, Stone Spirits lurk in the waters of the bay. And, often when the water is very still, rocks alone the shore reflect in the water as a mirror image. The reflection produces the illusion of a very long and symmetrical horizontal Totem Pole - A Stone Spirit. To see the effect, look at the shore line in the photo while tilting you head to the left.

Another of my favorite destinations is Prideaux Haven, also in Desolation Sound. The tidal exchange from the North and South, around Vancouver Island, meet near Prideaux Haven and therefore very little cold water from the ocean mixes with the warmer water found in this area. The warmer than normal water, makes for very good clear-sea-water swimming. An online Gallery of photos shows scenes of the area.

So far, work on the Cyrene has been fun. But, as everyone knows, . . . "A boat is just a hole in the water, in which to throw money".

UPDATE - May 20, 2013
Starboard Engine repaired, Cyrene went back into the water on May 2, but sea-trials found that the Starboard Engine would not go to full speed (3000 RPMs). The Injector Pump was removed and sent in for test, repair (if necessary), and calibration.  The theory is that a little salt water entered the "boost compensator" and stopped it from working.

UPDATE - July 4, 2013
Most repairs are done, I have parts for the GenSet, but will have to wait for time to install them. Two recent trips to the San Juan Islands have proven the repair to the Starboard Engine was very successful. At full throttle and 3200 RPM at 19.9 Knots GPS was available from both engines, my normal curse is at 2200 RPM at about 10 Knots.

--

Thursday, March 21, 2013

RPi as a WSPR Beacon with PA47


UPDATE:
Sorry,  this did NOT work as expected, the Wsprrypi code is still being developed. The second fork of the program is available. The RF output of the of the RPi is less noisy if the DC supply is from a well filtered source.


I have previously built my Homebrew PA47 Power Amplifier for a Propeller Microprocessor Beacons (see previous selected posts). The Propeller provides 12mW to drive the PA.

The Raspberry Pi provides about the same output power via the Dan Ankers Wsprrypi program. Therefore. it was a simple mater of connecting to the correct pins on the RPi GPIO Connector to give it a try. Thanks Dan !

Here is my initial lash up, with just a Low Pass Filter (LPF).
RPi WSPR Beacon with LPF
Measure Output into 50 Ohms =  5dbm
Here is the RPi and the PA47, with input and output LPFs attached.

With the two low pass filters, the measured output is 9.4 V PP at a 50 ohm load, or 220mW, which is 23.4dbm. The Dan's WSPR program uses only about 3% of the CPU.


I have plans to modify Dan's Wsprrypi program to include other beacon modes (e.g., QRSS) similar to those that I have used with the Propeller Processor.

FYI, This my complete family of experimental PA47 Amplifiers.
My PA47 Family
Max Power - 1w, 5w and 15w

On the air, WSPR Received Reports will be added here.


-- Home Page: https://WA0UWH.blogspot.com

Thursday, March 14, 2013

National Pi Day

Today, Mar 14, 2013 is National PI day.

When written as numeric today's date is 3/14, is similar to 3.14, which of course is the value of the first three digits of PI.

PI Day should be celebrated at 6:28 am, as that is the value of  "Tau", which is the value of  2xPI.

Today is also Albert Einstein's Birthday Anniversary (Mar 14, 1879) - PI Day is a well fitting tribute to a great man.

--

Wednesday, March 13, 2013

Rpi on the Network - Problem Fixed !

My Raspberry Pi is now back on the Network (see: my Rpi posts).

It has been offline, because I did not have an HDMI Display, and was not able to see the boot error messages. And, therefore I was not able to correct the boot problem.

I now have an HDMI Display, and have fixed the boot problem. The Rpi needed a simple "manual file system check" (i.e., fsck -y /dev/<disk>).

Currently my Rpi is back on the Network as before at: http://rpi.wa0uwh.com:8040/

The Rpi maybe on-or-offline the next few weeks as I try different system configurations.

--

Monday, March 11, 2013

Mom's Biscuits

This is post is not about Ham Radio, but about something else that I enjoy - eating good food.

Mom's Biscuits

On Saturday, Mom would have celebrated her 89 Birthday. And for that, I decided to try to make some Biscuits, the way she has done so expertly many time for our family Saturday morning breakfast (which was such a long time ago).

Mom was famous for her Biscuits and Pies. Nothing in the Cookbooks came close to; look, taste and texture of her baked goods. Her Biscuits were almost three inches tall, and very flaky, soft and crisp on the outside, she would always say: “I don’t know if they’l be fit to eat!” - but they were always, soooo . . . very-very good!

Somehow Mom’s always got the volume of dough just right, regardless how many people were eating. We would end up with just the right number of Biscuits for each person, plus one more. The last Biscuit was made from the trimmings, left over dough from the cutting process. My brother, two sisters and I, argued over who was to receive the highly prized Ugly Biscuit. For most of my childhood, Mom cut the Biscuits with a Red Handle Donut cutter (with the center hole cutter removed), later she switch and used an easy available drinking glass to make the cuts. This was way back in the good’old-days. when calories were NOT counted, . . . but Biscuits were.

I have tried several times in the past forty years to make Biscuits. The first time was while Mom was still alive, but that did not seem to help. My Biscuits always came out like the dreaded Hockey-Pucks. In fact, in my childhood family, there was a running joke; there were only two types of Biscuits; Mom’s, and Hockey-Pucks. Somewhere along the way, my sisters, seemed to have learned how to make Biscuits, but I had not.

Lately, I have been thinking about Mom’s Biscuits, I think I have always had the ingredients about right, although Mom never really followed a recipe. She would say; put in some of this and that, mix it up, knead it with your palm, pat it out flat, cut the Biscuits, and don’t play with the dough. I think her “technique and style” was more important than the ingredients. Maybe, I had just NOT learned the "technique and style" part of making Biscuits.

As stated, I have been thinking about Mom’s Biscuits, and thinking about how fast she worked at; the mixing, kneading, folding, cutting, and the fast clean up of the mess. Now, while remembering, I can still see her work at each step, and that is what I am now trying to duplicate with my new Biscuit making efforts.

Mom would have pre-heated the oven to 350 degrees F, although she would never wait for the oven to reach the set temperature. Once in the oven, a timer was NOT used, the Biscuits came out of the oven about 10 seconds before we were to set down to eat. To this day, I do not know how she timed meals so expertly.

I do not have a standard oven, for my baking efforts, I have a rotating Pizza Oven, on which I have cooked almost everything - it works better than expected for an oven. I have used it to cook some very good Brownies. My Biscuit efforts will cooked on the Pizza Oven.

Several weeks ago, I first tried the Pizza Oven for Biscuits with what I remember of Mom’s Biscuit recipe, but as usual, I got Hockey-Pucks. The puck tasted OK, but Tess (my dog) liked the pucks better than I.

Now, with my new appreciation for Mom's “Technique and Style”, I am trying again, with much better results.

I don't know if they'l be fit to eat !
.
Biscuits In the Oven
Mom's Biscuits were typically larger diameter (depending on the water glass she used as the cutter), for my first attempt my biscuits are smaller and leaned over as they cooked. For the next batch, I will find something larger to use for the cutter.

More Biscuits to be Saved For Later
Note: the obligatory Ugly Biscuit in the center.

There will be Biscuits left over and saved for later.

BTW. this batch of Biscuits were pretty Darn Good, but not exactly how I remembers Mom's. A little more thinking and practice is needed.

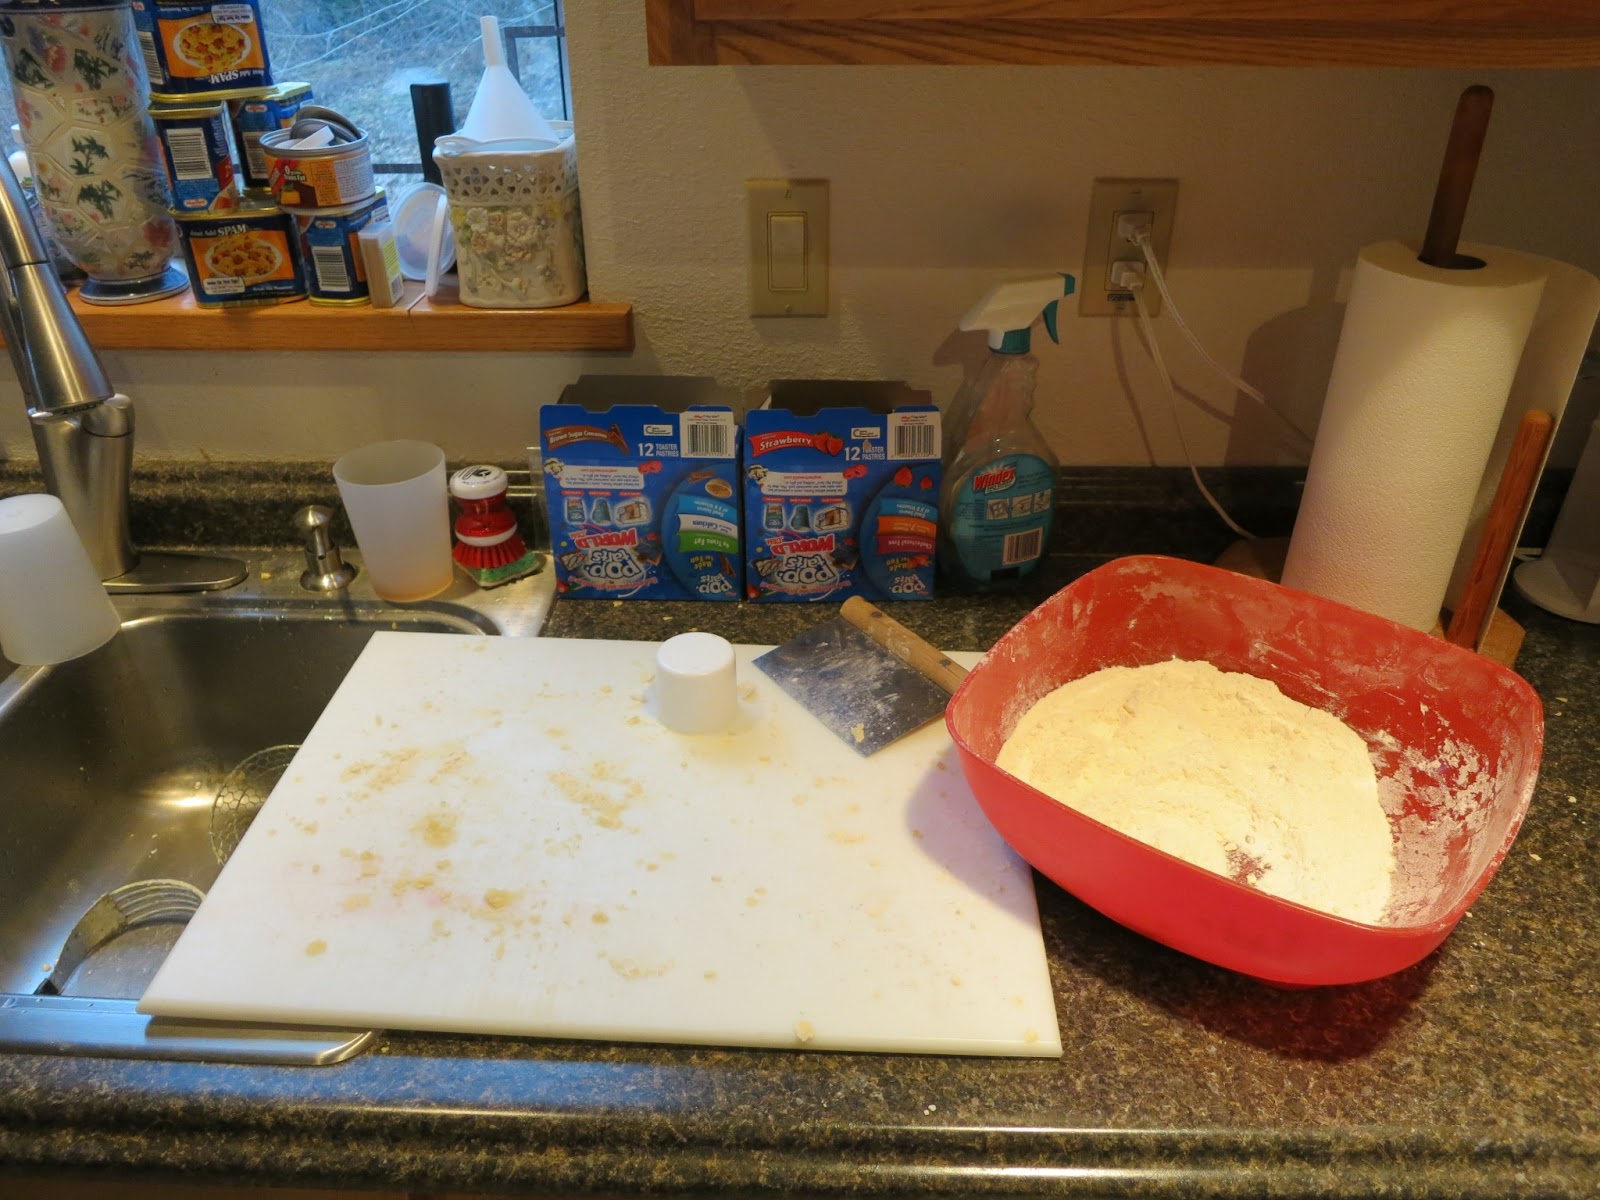
Now, the mess needed to be cleaned up, this is something Mom would have done within seconds, after the Biscuits were in the oven.
It is a Big Mess, . .  but it was worth it !

Thanks Mom, . . . for the great memories, . . . and Happy Birthday !


--

Sunday, March 10, 2013

Rpi on the Network - NOT !

Sometime today my networked RPi died, not sure why, but I will not have time to fix/rebuild it until later this week. At last count it had served web requests from 213 remote users. See previous post.

The RPi file system and log files still exists and can be mounted on another system for review.

I hope it was not Hacked!

More info later.


UPDATE
The RPi is back on the Network as http://rpi.wa0uwh.com:8040/, but it maybe up or down depending on my experiments.

--

Wednesday, March 6, 2013

Rpi Backup

My Rpi is working very well (as shown on previous post). My many years of Admin'ing UNIX systems is paying off.

I have spent several hours / days configuring the system, building a web page, and playing with use ideas. I do NOT want to lose any of my efforts due to a dumb mistake or system crash - so a backup is needed.

Several backup strategies are suggested in the web forums, the most often mentioned method is; shutting down the Rpi system, and cloning the SD card. Which I think is a good idea - but maybe only once in a while. The size of my 16GB SD card and system interruption precludes doing this very often.

Most of the Rpi system is easily re-built from the original image, and most (if not all) other system additions are obtained from online software depots.

After building (cloning) the original SD image, and like most Rpi users, I expanded the file system size to fill the rest of the SD card. And then executed the following:


sudo aptitude update
sudo adduser --system <my-desired-user-name>


And, of course, I had to install "fldigi" for a potential radio connection.


sudo aptitude fldigi


Now, . . . I really do not need a full backup, just the backup important stuff. A very clever backup command is "rsync", which I have used many times on very large systems. Rsync can be installed as:


sudo aptitude install rsync


With the following rsync command,  I can backup a few important directories to another remote linux system, in this case a system called "shilo", from the local (Rpi) system is called "magpi". The directories that I want to backup are: "etc", "boot", "home", "root", and "var/spool/cron".


(
  cd / &&
  rsync -avzR --delete etc boot home root var/spool/cron  shilo:/Backup/magpi/SnapShot01
)


The nice thing about "rsync" is that the backup files are easily accessed via "scp" or directly on the remote machine. Also, re-executing the same command, will only transfer the files that have been changed. See the rsync manual page.

--