Wednesday, February 29, 2012

A Small Part Quest - Cont'd

Jeff - KO7M sent me a link to some nice 3.5mm stereo jack on eBay, 100 for only $20.99 and with free shipping. The PJ3065 jacks are surface mount with 5 leads; ground, tip-and-ring, and two internal switches.

PJ3065
3.5mm Surface Mount Stereo Jacks
Previously I found small jacks (6.2x11.5mm) for my projects, but due to size restraints internal switches are not possible with that footprint. The eBay jacks are a little bigger (9.5x12mm), but they do have the two switches.

I am always looking for smaller parts, for my continued project goal of; making my projects as small as my abilities allow.

A package of PJ3065 Jacks is now on order, and will be a nice addition to my parts box.

--

Monday, February 27, 2012

A True Software Defined Transmitter

The last few weeks; Julian - G4ILO, Jeff - KO7M and myself have been working on building WSPR, QRSS, and OPERA Beacons. For that, we have built everything around the Parallax Propeller Microprocessor. The processor, the protoboards, and associated peripherals (i.e, Rotary Encoder, LEDs) are generic and could be used for any microprocessor control project. Even the CW Key jack is generic and is connected to normal data lines, and therefore it could be used for other projects, such as, stereo audio output for a robotic sound system.

Stated another way, Nothing on the system could be considered Transmitter specific. This project is only a Transmitter because of the software that is running. Therefore it is a 100% Software Defined Transmitter, an "SDT".  I do not think there are many that can make the same claim.

A True 100%
Software Defined Transmitter
Only the optional add-on Output Low Pass Filter , Power Amplifier, and Antenna could be considered specific to a Transmitter. The raw processor provides about 7mW of RF power, the amplifier raises that to about 100mW. But contacts have been made with just the low power of the bare bones generic hardware as an SDT.

We have used the SDT as time scheduled WSPR, QRSS and OPERA Beacons and have successfully received reports from many places around world. With the addition of Jeff's Keyer Program, and my UI program (to take advantage of the LCD and Knobs) the SDT can be used interactively with a CW Key. As more software is developed, more modes and capability will be implemented.

The SDT In Action
Internet Based Map Report on the Left
Text Reports on the Right
The only new thing I plan to add to the collection of peripherals for the microprocessor protoboard is an external high precision master clock to help thermally stabilize the RF output frequency (parts are on order).

So far, I am very pleased with the results we have obtained.

NOTE: If you try this, make sure you use an output Low Pass Filter, as the Propeller output is a square wave with many harmonics. The FCC requires harmonics to be down by 43db.


If you are a HAM and interested, buy a Prop, join the fun.


(Note: I am not an agent or associated with Parallax)

--

Monday, February 20, 2012

Propeller Project Status - Update

Success, another major hurtle jumped for my multi-mode Prop (Propeller) Beacon GUI implementation. The Real Time Clock is working and providing scheduling for the Beacons.

As previously blogged, my goal was build (assemble) and configure the following (the current status shown):

UPDATE: I have updated the following to reflect current status. GUI is DONE  :-)
  • LCD Display
  •   - 100% DONE -

  • Audio Feedback (1/2 inch speaker, for beeps and squeaks)
  •   - 100% DONE - 

  • Real Time Clock
  •    - 100% DONE - and working! My WSPR Beacon is not ON schedule !! 
  •      The clock is spect'd at 5 ppm ( which is much better than the Prop ), I wished it had a 
  •      High Freq output port.

  • Two Rotary Encoders with Push Buttons
  •   - 100% DONE - Encoders and Buttons work very smooth and easy to use.

  • Several Generic LEDs (controlled via I2C)
  •   - 100% DONE - Two Red and two Blue, 0805 LED's mounted just below the Encoders

  • Maybe a Precision System Clock
  •   - 0% - I have some parts on order.

  • Provide native I2C control
  •   - 100% DONE - currently being used for control of RTC and I/O Expander to drive
  •     LED's,   more expanders can be added as necessary.

  • And, preserve at least 16 lines of direct I/O from the processor for add-on project control
  •   - 50% - Change of goal, only 8 data lines and I2C will be available for additions devices

UPDATE: A New Requirement

  • SD Card and File I/O
  • - 0% - Just Added


Due to Jeff's - KO7M programming efforts and his new Mores Keyer and Transmitter program,  I had to add two 3.5mm Jacks for a CW Key and Keyed Output Line, but actually, the ports are just data I/O lines available for what ever is needed. His Keyed / Transmitter is a fun little toy.

At this moment, I am watching the Display and Lights, while the Beacon runs WSPR, QRSS and OPERA in timed sequence (as necessary by WSPR). Next task is to hook it up the Low Pass Filter, the PA and the Antenna, . . . maybe soon.

This project has be a challenge, more due to my lack of knowledge or understanding of the Prop and the selected peripherals.

But, . . . It's all fun, with a Prop !!

-

Sunday, February 19, 2012

Prop Stack Size: Problems and Solution

I have been having problems with some Parallax Propeller programs for use with my QRP Beacons and Transmitters.

My Propeller Transmitter Station
Running KO7M CW Keyer Code
Thanks to Jeff - KO7M , I think we worked through most of the issues. One major issue was that I had was; that I had specified the Stack Size TOO small for several of the COG's or processes. See #6 on Lessons Learned a previous post. Currently my new approach will be to set the Stack arbitrarily large (i.e., 64), and trim only if necessary.

Jeff found a Prop Object that estimates and report Stack usage. Our initial reports indicated my Stack were growing as large as 48. My initial expectations were more like 16. As can be seen, my estimate was way off, and likely the cause of many of my programming problems and needless frustration.

The Stack Usage tools reports the Stack Size by bit-banging the report on one of the Prop pins that should be connected to a terminal. My problem is I do not have a easily accessible terminal in my Ubuntu environment connected to the Prop. With Ubuntu, the Prop UI wants to control the terminal I/O lines for EEPROM download, and a quick change of UNIX port would be necessary to make the switch (Yeah, I know, it's my problem, and that's what I deserve for using Ubuntu :-).

The Stack Usage tool finds the Stack size by writing a known pattern onto an empty stack. then later reports the count of over-written stack entries. The Stack Usage Object is a little complex and not very flexible for my use.

Well, I can do the same as the Tool (and maybe better), with a simple cut-n-paste routine (method) into any main Object.

My first typical PUB method appears as follows:


PUB Demo | stat

      StackLengthInit

      Init   ' Which includes the LCD setup

      < normal program stuff goes here >

      ' Report Stack Length
      LCD.moveto(1,2)
      LCD.dec(StackLength)

      repeat
        pauseSec(1)


I inserted the following just below the first PUB method. Calling "StackLengthInit" sets it up, and then "StackLength" can be used at any point to report the usage.


DAT
CON   StackSizeMax = 256
      StackPattern = 19823343 ' Some Random Pattern

PRI StackLengthInit : i | S[StackSizeMax]
      i := 0
      repeat StackSizeMax
         S[i++] := StackPattern -> 7

PRI StackLength : i | S[StackSizeMax]
      i := 0
      repeat StackSizeMax
        if S[i++] == StackPattern -> 7
           return i

DAT


Note: I used the  "StackPattern -> 7" expression to (maybe) help provide some bits in the upper bits of the saved stack space (maybe it is not really necessary, and just the StackPattern would surfice :-).

It seems to work very will for my Ubuntu Prop Development environment, and it is flexible enough that I can save or report the results as I desire, on my standard LCD or a Terminal (if connected).

From now on, I will be much more Stack Size Aware :-)

It's all fun with the Prop !

--

Tuesday, February 14, 2012

Propeller Lessons Learned

The last few Propeller programming days have be frustrating, I could not figure out how to properly pass parameters by reference. Several debugging tactics only compounded the problem and lead to even more frustrations.  After several hour, and talking with Jeff - KO7M, we were able to sort everything out.

The lessons learned are documented here to maybe help other Propeller users:

Lessons Learned

0. Debugging of other COG methods can not used LCD, TERM or TV output, those types of Objects are not multi-COG aware. Use global variable to provide debug information back to the main program where the LCD, TERM or TV Object initialized those objects and "print" can be used.

1. Parameters passed by reference can be used with any method and the cognew statement

2. The calling statement should appear as:
  • some_method ( @some_variable )
3. All use of the reference parameter within sub methods should appear as follow:
  • long [ pArg ]  :=  some_value
  • or
  • set_some_variable  :=  long [ pArg ]
4. A passed by reference of an Array looks the same in the calling statement, as:
  • some_method ( @some_array )
5. Use of the reference array within a sub method should appear as follows:
  • long [ pArg ] [ some_array_index ]  :=  some_value
  • some_variable  :=  long [ pArg ] [ some_array_index ]
  • but
  • long [ pArg [ some_array_index ] ]  := some_value  -  IS WRONG
6. The newly created COG should be given enough Stack space, if in doubt, make it larger, strange or bad things happen if the stack is too small.

Conclusion

These ideas appear simple now, but they were learned (very much) the hard way, where the manual and simple examples were not much help.

This following is a contrived test program to simulate a long running background task, where control and progress can be monitored from the calling method.


CON
    WMin = 381

    _CLKMODE = XTAL1 + PLL16X
    _XINFREQ = 5_000_000

    CLK_FREQ = ((_clkmode-xtal1)>>6)*_xinfreq
    MS_001 = CLK_FREQ / 1_000

    ' INFO for LCD
    #16, LCD_RS, LCD_RW, LCD_E, LCD_BL
    #12, LCD_DB4, LCD_DB5, LCD_DB6, LCD_DB7
    #16, COLS
    #2,  ROWS

    ' Arg Array Element Names, iSIZE must be last
    #0, iCTL, iSTAT, iPROGRESS, iSIZE

    ' Process Control States
    #0, cRUN, cABORT, cREPORT
           
    ' Returned Status States
    #0, sNOTSTARTED, sINIT, sRUNNING, sFINISHED, sABORTED  

OBJ

    LCD   : "jm_lcd4_ez"   ' Rev 1.4

VAR

PUB Demo |  subCogId, okay, Args[iSIZE], Stack[32] ' Args and Stack could be Globals
      Args[iCTL] := cRUN
      Args[iSTAT] := sNOTSTARTED
      Args[iPROGRESS] := 99


      LCD.Startx(LCD_BL, LCD_E, LCD_RW, LCD_RS, LCD_DB4, COLS, ROWS)

      LCD.cmd(LCD#CLS)   ' Clear Screen
      LCD.blon
      LCD.str(string("Init:"))
      LCD.moveto(1,2)
      LCD.str(string("Stat: "))
      LCD.moveto(8,2)
      LCD.str(string(",Prg:"))
      pauseSec(2)

      Args[iSTAT] := sINIT ' Assume RUNNING State

      okay := subCogID := cognew(mySUB2(@Args), @Stack)

      LCD.dec(okay)


      ' Report the New COG's Progress
      repeat while Args[iSTAT] < sFINISHED

        LCD.moveto(6,2)
        LCD.rjdec(Args[iSTAT], 2, " ")

        LCD.moveto(13,2)
        LCD.rjdec(Args[iPROGRESS], 3, " ")
        LCD.out("%")

        if Args[iPROGRESS] =< 75  ' To simulate an ABORT required condition
          Args[iCTL] := cABORT

        pause(200)


      ' Report Final Results
      LCD.moveto(6,2)
      LCD.rjdec(Args[iSTAT], 2, " ")

      LCD.moveto(13,2)
      LCD.rjdec(Args[iPROGRESS], 3, " ")

      pauseSec(1)

      LCD.moveto(1,1)
      LCD.str(string("Finished: "))

      repeat             ' Keep alive
        pauseSec(1)


PUB mySUB2(pArgs)        ' A simple cog, that calls yet another Method

    mySUB1(pArgs)


PUB mySUB1(pArgs)

    pauseSec(2)          ' Simulate Initization time

    long[pArgs][iSTAT] := sRUNNING

    repeat while long[pArgs][iPROGRESS] > 0
      if long[pArgs][iCTL] == cABORT
         long[pArgs][iSTAT] := sABORTED
         QUIT
      long[pArgs][iPROGRESS]--

      pause(200)  ' This is the dummy program process activity

    long[pArgs][iSTAT] := sFINISHED


DAT
PRI pauseSec(sec)
      pause(1000 * sec)

PUB pause(ms)
      waitcnt(((clkfreq / 1_000 * ms - 3932) #> WMin) + cnt)

DAT


This program does not represent good Propeller programming practices, it was contrived just to understand parameter passing by reference. A typical or more correct strategy would use methods to control and report status of the sub COG or other methods.

Thanks Jeff, for the help

It is all fun with the Prop.


UPDATE
Lesson Learned Number "6."; has bitten me twice since this was first posted: Give the COG More Stack Space !  For now I am starting with 64 Longs, and will trim only if necessary. Previously I was using 16 or maybe 32 Longs for "cognew" stacks.

--

My XBM-10-2 Chirpy

Several months ago, I started collecting parts and designing a circuit board for a Chirpy XBM-10-2 Transceiver (designed by Roger - G3XBM). Later, Lyle a member of our local pQRP group, suggested a challenge for the members to build the Chirpy. I did not tell him that I already had one in progress.

But, my progress has been VERY slow due to other projects, and the lack of critical parts (e.g. the 28.06mHz watch crystals).  As always, my goal with this project was to build it as small as I can (just for the challenge). The PCB layout was created with DipTrace and then commercial produced by DorkBotPDX.  The PCB size is 0.7 x 0.9 inches. The boards were received and have been sitting here in my Shop for a while, awaiting for my time to install parts and do a smoke test.

Today was the day for the project build and test.

As built, the XBM-10-2

Some of the circuit components were changed, due to the reduced size and parts on hand. As implemented, the circuit includes the Optional Low Pass Filter, and two 1/8 inch phone jacks. One jack for the Hi-Z Ear Phone, and the other jack serves both as the CW Key Port and Power Switch. The suggested T37-2 Toroid was replaced with a T25-2 to fit in the allocated space between the jacks on the underside of the board. Most of the caps are 0805 (with one 1206), the resistors are 0603's, and of course, two SOT 2N3904 transistors. The Battery Clip is hardwired (it could have been on a header), the Antenna connection is via a two pin header.  Mounting is via double sided tape on the side of the 9 volt battery.

Note: the negative side of the battery is connected to circuit ground by inserting the key phone plug. Which if a stereo plug is used, as typically used with a paddle key, the dash key becomes a power switch and the dot key is the CW key (it takes a little getting use to). If a mono plug is used with a straight key, then the power is applied to the circuit by just inserting the key, and results in normal key operation.

So far, I have built two, and each seem to work as expected (and there was NO smoke).

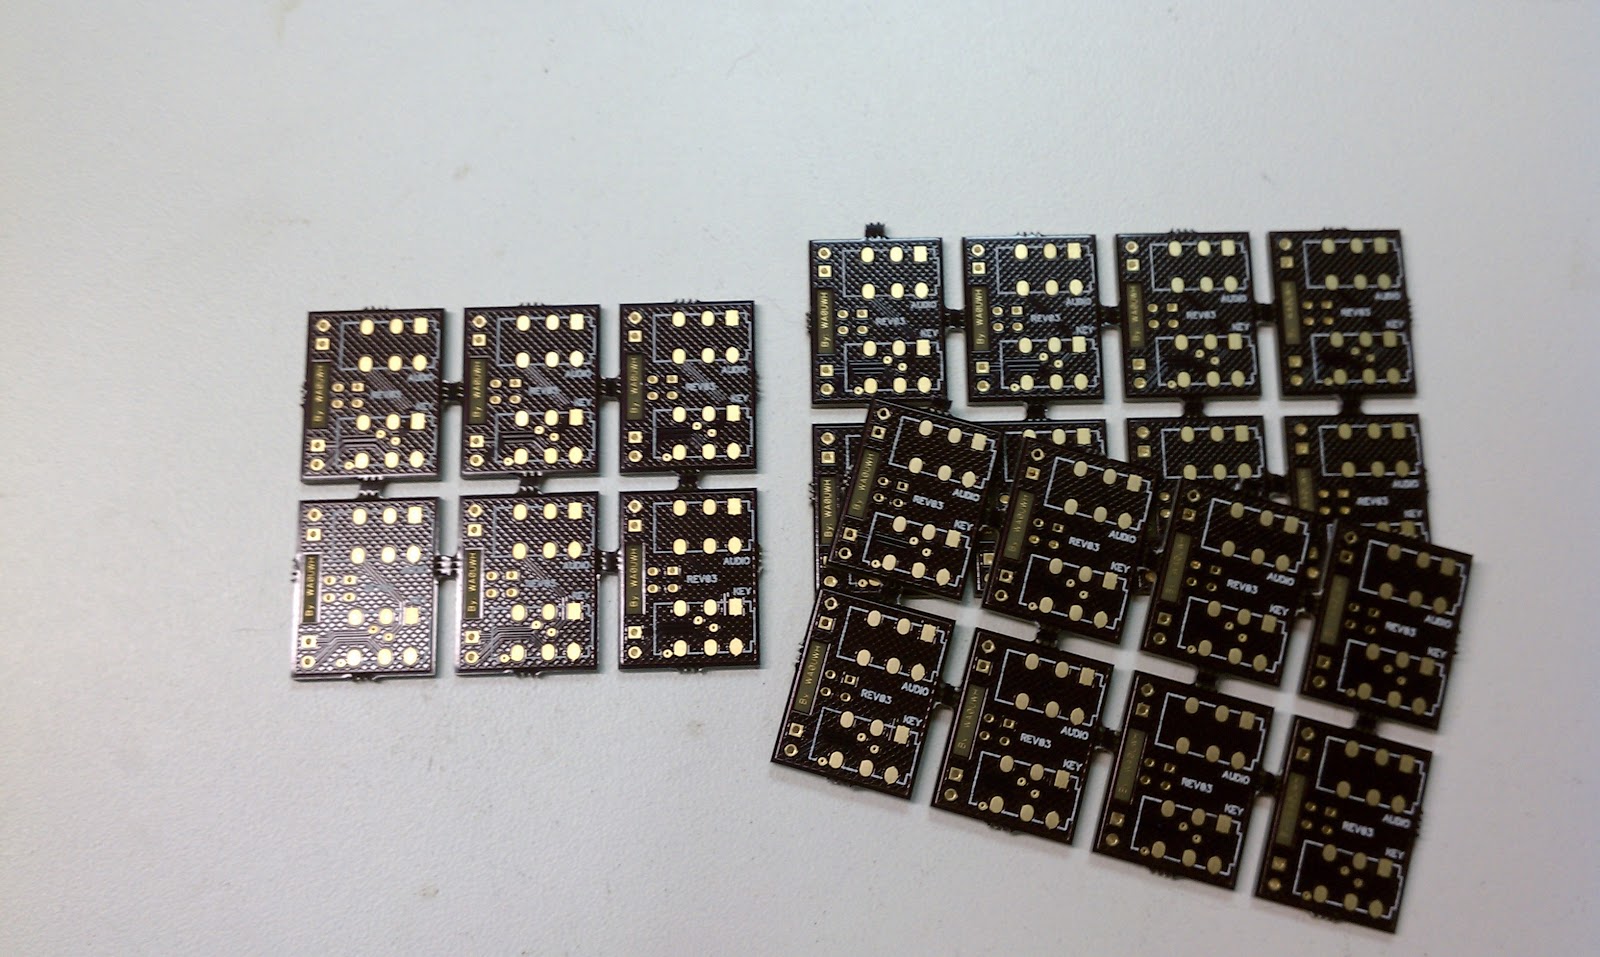
Why So Many Boards,?
Well, . . the PCB Manufactures will not build just one
I have not used the Transceiver in a QSO yet, but the power out measures 0.3 volts p-p at a 50 ohm dummy load (0.3vpp / 2 × .707)^2 / 50 = 225nW, I would have expected more). The tone sounds good on my general coverage receiver, and not too much chirp.

I can hear a received signal, from my MFJ-269, but the receiver sensitivity has not been measured. The receiver does not seem to suffer from hand capacitance normally experienced with Regen Receivers, maybe that is an advantage of; the circuit design, or the small size of the circuit and board.

With 9 volt Battery appropriate bias, more power and sensitivity may be obtained, note the original circuit was designed for 12 volts. In the next few days more performance data collection, experiments and on-air tests are planned. My friend Jeff - KO7M has a spectrum analyzer, so the next time we get together I will have a harmonic content report.

Other implementation of Chirpy can be found via a google search.

Thanks Roger, for this neat "little" Chirpy Circuit Design

And hopefully Roger,  you will forgive me for "expanding" the component count with the on-board Low Pass Filter, Key and Audio Jacks, Antenna and Battery headers, and a battery low side by-pass cap.


UPDATE
I have had several requests for boards or kits, the board would require re-lay-out to correct some spacing issues, proper documents would need to be prepared. I am not sure many people would want to build at this scale. I would like to make a kit available, but price and postage would not support much effort for only a few sales.

--

Wednesday, February 8, 2012

Encoders for the Prop

The last day are so I have been trying to get a Chronodot Real Time Clock (RTC) to interface with my Propeller beacon. The idea is to have it schedule the WSPR Transmit Cycle, which are required to start on the even minute of hour, plus 2 seconds (ideally plus or minus 1 second). In PC environment a WSPR beacon uses the system clock for scheduling. With my Propeller Microprocessor, a PC is not connected, and therefore the processor has to do the scheduling. Which can be done, but without a RTC, adjustment to the micro's clock it done by hand - what a pain.

But sadly, I can not get the RTC to talk back to the Propeller. Maybe my Chronodot is dead, I have ordered a Bus Pirate to help with diagnostics. Much more work is needed.

While awaiting the Bus Pirate order, I decided to tackle the next GUI item that is needed  for the Propeller Beacon Controller. Which is, the two Rotary Encoder Service Routine.

On a  previous projects based on the Arduino Board, I had to resort to a complex state machine programming to achieve the multitasking that I desired. The Rotary Encoders were a part of the state machine, and were interrupt driven.

With the Propeller, there are NO interrupts !, . . but there are eight processor where one processor (or more) can be dedicated to the Encoder task. Originally I thought it would take one whole processor for each (Arduino style) Rotary Encoder task. But more reading through the manual and Spin Programming Syntax, I found a "waitpne" (wait for pins not equal to mask) statement. This statement allows all of the Rotary Encoder (and push button) pins to act as one big switch. All that is needed is to decode (poll) which pin was changed, and increment counter as necessary. This was a 100% self written program/driver Object, a fun project, I will post the code later.

Two Rotary Encoder Knobs
with Integrated Push Buttons

The first thing did with my new programmed function was to implement a RF Frequency Calibration Offset, I have several Propellers that I have been using, and keeping track of the CAL Offset for each Prop Board has been a problem. Now if it is not exactly on Frequency it is just a quick twist of the knob to correct it.

The second programming function I implemented; was a reset of the Epoch clock on a push of a button,  which starts the WSPR time cycle. Until I get the RTC working a little manual intervention is still necessary.

It's just more fun stuff with the Prop !

--

Monday, February 6, 2012

Display ON

I have been running my 30m Propeller QRSS, WSPR and OPERA Beacon the last few days, and have received many local and DX spots as reported on the web.

A periodic restart (reboot) or re-program of the beacon is needed to keep the beacon on frequency, to change the mode, and set the right time sequence - which is a bit of a pain. What is needed is a GUI with display and controls to make adjustments as necessary while the beacon is running. To that end, I have been attempting to build a standard GUI for the Propeller Microprocessor - sounds simple doesn't it. Well it maybe simple after I get over some initial hurtles.

The first GUI hurtle was to get a LCD Display to work correctly, there are many contributed LCD driver in the Propeller Object Exchange Library, most use conflicting pin connection or they do not provide the 4bit data path that I desire for my display.

The GUI
The real problem here is there are Too Many LCD contributed drivers from which to choose. all with conflicting pin assignments and programming interface. It is difficult to understand the difference between them without actually downloading and trying each - which is very time consuming.

After much searching I finally found "jm_lcd4_ez" REV 1.3 (see previous post), which is a LCD driver that meet my requirements. In the Object code the author provided additional entry point for alternate hardware configuration. Many of the available LCD drivers require adjacent data and control line connections to the micro as the data and control are transferred via one instruction as a full byte. The Propeller is more flexible than that, and there is no need to be that restrictive. The selected author recently added the required flexibility within the top level Initialization routines, I tried his driver and it worked most of the time, but it had problem at power up.

I almost gave up on this driver and starting looking for yet another, even though I liked the documented flexibility and implementation. The author forgot to do the same flexibility modification at the lower "lcdinit" level. With a little work and experimenting I was able to make the correction to the low level routine. And now,  all is well.

If there is interest, I will publish the corrections here, else I will try to chat with the author.

The next step for GUI development is to program the two Rotary Encoders.

UPDATE
I received an email reply from Jon, the author of  the "jm_lcd4_ez" LCD driver object, he has now confirmed the bug, and is going to fix and update his Object (to REV 1.4) on the Propeller Object Exchange. - Thanks Jon.

--

Saturday, February 4, 2012

Propeller GUI

UPDATED, Feb 5, 2012 Rev C

I am planning a GUI for my Propeller Amateur Radio Projects. As show on the previous post, I have the hardware cobbled together, but was stuck on the strategy of assigning processor pin to the LCD Display and the Encoders. After more than several hours and reading conflicting strategies and OBJ(ect) module support documents. I decided to just pick a pin assignment and get things started. The wires that I will use behind the "Propeller Proto USB" board are small and can be changed if another more sensible strategy is discovered later. Note: first attempt was abandoned, this page has be updated.

See Propeller Object Exchange "jm_lcd4_ez" download file.

My current pin assignment plan is as follows:

Note: I have updated the following to reflect current project pin usage.


Schematics

       P8X32A
     ┌────┬────┐ 
     ┤0      31├ RS232         0V    5V    0V   P16   P17   P18   N/C   N/C
     ┤1      30├ RS232         │     │     │     │     │     │     │     │
     ┤2      29├ I2C           │VSS  │VDD  │VO   │R/S  │R/W  │E    │DB0  │DB1
     ┤3      28├ I2C           ┴1    ┴2    ┴3    ┴4    ┴5    ┴6    ┴7    ┴8
     ┤4      27├ RF         ┌────────────────────────────────────────────────┐  LCD 16X2
     ┤5      26├ Encdr1B    │ 01 02 03 04 05 06 07 08 09 10 11 12 13 14 15 16│  HD44780-BASED
     ┤6      25├ Encdr1A    └────────────────────────────────────────────────┘  SSC2F16DLNW-E
     ┤7      24├ Encdr1P       ┬9    ┬10   ┬11   ┬12   ┬13   ┬14   ┬15   ┬16
     ┤VSS   VDD├               │DB2  │DB3  │DB4  │DB5  │DB6  │DB7  │A(+) │K(-)             
     ┤BOEn   XO├               │     │     │     │     │     │     │     │
     ┤RESn   XI├              N/C   N/C   P12   P13   P14   P15   5V    P19 via Transistor
     ┤VDD   VSS├                                                             and 2.2k 
     ┤8      23├ Encdr0B                                                  
 Kyd ┤9      22├ Encdr0A
KDit ┤10     21├ Encdr0P
KDah ┤11     20├ Speaker
 DB4 ┤12     19├ BackLight
 DB5 ┤13     18├ E
 DB6 ┤14     17├ RW
 DB7 ┤15     16├ R/S
     └─────────┘ 


PIN ASSIGNMENT
   VSS  - POWER SUPPLY (GND)
   VCC  - POWER SUPPLY (+5V)
   VO   - CONTRAST ADJUST (0-5V)
   R/S  - FLAG TO RECEIVE INSTRUCTION OR DATA (via 2.2k ohm)
            0 - INSTRUCTION
            1 - DATA
   R/W  - INPUT OR OUTPUT MODE (via 2.2k ohm)
            0 - WRITE TO LCD MODULE
            1 - READ FROM LCD MODULE
   E    - ENABLE SIGNAL (via 2.2k ohm)   
   DB0  - DATA BUS LINE 0 (not connected)    
   DB1  - DATA BUS LINE 1 (not connected)    
   DB2  - DATA BUS LINE 2 (not connected)    
   DB3  - DATA BUS LINE 3 (not connected)    
   DB4  - DATA BUS LINE 4 (via 2.2k ohm)
   DB5  - DATA BUS LINE 5 (via 2.2k ohm) 
   DB6  - DATA BUS LINE 6 (via 2.2k ohm) 
   DB7  - DATA BUS LINE 7 (via 2.2k ohm) (MSB)
   A(+) - BACKLIGHT 5V
   K(-) - BACKLIGHT - via 2.2K ohm and Transistor to GND, Base to P19 via 220 ohm Resistor


In addition to the above, I plan to use pin 19 for the LCD Backlight control (which is outside the scope of most published Objects), normally the backlight (LCD pin 15) is connected to a variable resister.

Note: Because the LCD is actually a TTL (5v) device, 2.2k ohm resisters are suggested in series with all data lines connected to the Propeller (a 3.3v device). These resistors will allow bidirectional level compatibility.

More research is needed before I assign of the Encoders and Speaker pins, but I think they will be in the 20 to 27 in range. My goal will be to reserve pins  0-7 for application I/O and 28-31 for standard Propeller Functions (i.e., I2C).

Note: There are many contributed OBJ's in the Propeller Object Exchange Library for an LCD Display, but many have conflicting pin assignments/usage. The above is just the strategy I selected.

UPDATE

The LCD Driver selection for my Arduino project GUI was much simpler - I have now invested about two days in this effort for the Propeller . And yet, the selected LCD driver does not always correctly initialize the LCD. More research and experimenting is necessary. :-(

--

Thursday, February 2, 2012

Propeller Project Status

If you have been following this blog and the links contained, you will know that Julian - G4ILO, Jeff - KO7M and myself are experimenting with the Parallax Propeller Micro Processor for Amateur Radio Projects (and for fun). Jeff and I live very close to each other and occasionally get to together to compare projects, Julian provides insight, inspiration and keeps us up-to-date with his projects via email and his blog posts.

Our current efforts with the Propeller center on WSPR, QRSS and OPERA Beacons, but I suspect the Propeller will find it's way into many of our future Amateur Radio Projects.

Originally I thought the Propeller Micro Processor was just a toy, with it's "Propeller Beanie Hat Logo", it was just a hobbyist micro processor, similar to the Parallax Stamp Micro. Several years ago, I had dismissed the Stamp and Parallax as a less than serious project micro platform. In the last few weeks I have learned that my pre-judgement was WRONG. Now I know the Propeller is a Serious Hobbyist Project Micro Platform, that provides many capabilities that most other micros lack.

I first learned of the Propellers RF PLL Oscillators and other interesting functions via a post by Wardy, it has since been my center project focus.

Many of my previous projects used Microchip micros, or the relatively new Atmel micros. With them I found myself always writing control software to do multi-tasking. In some cases the multi-tasking control software was larger than the desired task. With the Propeller multi-tasking is as simple as one line of code to create a new COG (process). The Propeller contains eight Independent COG's for programs to run. Enough sales chat, back to my project.

Julian, Jeff and myself are working on independent implementation of the Human Interface, see Julian's, and Jeff's Blogs.

(paragraph corrected Mar 1, 2012)
My approach centers around the "Propeller Proto USB" board. The boards are available in groups of four (4) at about $100, or about $25 per board. Note, I could not buy, build or collect enough parts to Homebrew my own platform for $25.

The idea is build a generic project Human Interface with the following attributes or functions:
Initial Stages of  Control Integration
The controls, speaker and LCD are solder in place, wires to connect to the micro is next.

Because the Human Interface will occupy the upper level of the "Propeller Proto USB" board area, add-on projects will be attached below via standard header pins. This combination provides a nice project stack, similar as seen in the Arduino world. Two full rows of holes are available on the right or the lower edge for location of project headers, I need to think more about that soon.

My current Beacon project could really use this type of interactive controls. I am excited and looking forward to more fun projects.

Join the fun, . . . get a Prop.

--