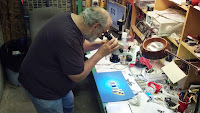
Larry has been sailing around the world in his sailboat for that last few years. He returns to the Seattle area to see his grand kids and families. We try to get together at least once, each time he is in town.
For this visit, Larry had several projects that we worked on in the shop. He was in need of a way to monitor the output of his generator and/or other power sources that replenish his battery banks.
 |
| The Artwork and Toner Transfer Ready to Etch |
What was needed was a small DIY PCB to hold the Hall Effect device and the few other devices that provide the input for a monitor and display.
This PCB will be mounted on-or-near the power source. The Hall Effect device that Larry will be using is shown setting on the right edge of the PCB.
My previously used and blogged Toner Transfer PCB method was used to build the necessary remote boards. We used Inkscape to create the original artwork.
 |
| Larry Cutting the Reverse Side Toner Transfer Image |
 |
| Larry at the Sink, kneading the bag while running Hot water over it, which is filled with Etch and His board |
 |
| The Cut boards, Ready for Drilling |
This is the first time I have tried making Toner Transfer PCB with large pads or Ground planes, on my projects I normally avoid them by using cross hatch grid for the Ground Planes. Space for some small capacitors are also included for line conditioners at the remote.
 |
| Board Inspection |
--