It is a cold bright winter day in the Pacific Northwest, just the kind of day for an indoor shop project.
Winter in the Pacific Northwest - Near Seattle
About 30 Deg F
For this project, I used the "Toner Transfer Paper" and GBC Laminator from Pulsar, , and the following "Etch In a Bag" method to produce the PCB, it is fast and easy.
Etch In a Bag
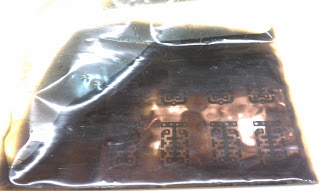
I use a little Ferric Chloride in a Zip Lock Bag, warmed under hot running water - it took about 6 minutes (dependant on the freshness of the etch) for this 1/2 oz copper clad board. Running Hot water over the Bag while etching provides gentle agitation of the etch. A small air pocket within the bag assist in etch movement.
Ready to go to the sink and running hot water
Trouble spots can be helped by rubbing them
through the bag with your fingers
Photo taken at 12:26:49
Trouble spots can be helped by rubbing them
through the bag with your fingers
Photo taken at 12:26:49
A Quick Look - Finished and ready for Clean Up
Photo taken at 12:32:21
A Flawless Print/Etch, Ready for Resist Removal
Photo taken after Clean Up and Inspection at 12:39:24
I did not use the suggested "Green Foil" (see Fab-in-A-Box) to cover the Toner, as the laser print was very dark and full, the result was much-much better than I expected.
Clean Up
Normally I store the Bag with Etch within yet another Zip Lock Bag hanging via a clip for later use. Storing the bag vertical prevents the etch from invading the bag zipper.
The Bags that I use are brand name "Ziploc" Heavy Duty Freeze Bags.
I will use Scotch Brite and warm running water to remove the Resist, it is easy and not a chemical mess.
Note: this batch of Ferric Chloride is about spent. The next project will go into a fresh bag and etch.
UPDATE
I did not start with fresh the Etch for the next project (see next post), I was lazy. This old stuff etched a bit slower, but it worked OK with the aid of heat from running hot water over the bag.
--


No comments:
Post a Comment